EOS Carbon Hood Vent Replacement: Acura Integra Type S Bolt-On Install
Extreme Online Store's carbon hood vent for the 2023+ Integra fully replaces the factory vent (it isn't an overlay). Pop the hood, remove the metal shroud, release the clips and the three nuts, then bolt the carbon vent on and put the rubber grommet back.
Full video (6 min): Carbon Fiber Hood Vent | Venting the 🔥 | EOS · John's YouTube channel
Get the parts
- Socket set with 10mm: Generic pickGeneric pickBuy ↗
- Clip and trim removal tool set: Generic pickGeneric pickBuy ↗
- EOS carbon hood vent replacement for the 2023+ Acura Integra (Extreme Online Store, link from the description)Buy ↗
As an Amazon Associate I earn from qualifying purchases. Some links are affiliate links.
Extreme Online Store's carbon hood vent for the 2023+ Integra fully replaces the factory vent (it isn't an overlay). Pop the hood, remove the metal shroud, release the clips and the three nuts, then bolt the carbon vent on and put the rubber grommet back. This 6 min guide covers the Extreme Online Store (EOS) carbon fiber front hood vent.
Overview
John replaces the factory hood vent on his Integra Type S with a carbon fiber one from Extreme Online Store (EOS). It's one piece and bolts on, so it fully replaces the OEM vent instead of sitting on top as an overlay. Shipping inside the US was fast (about two days for him) and the packaging was good. The part is carbon fiber on the top and on the underside people won't see, and it feels solid, which he finds confidence inspiring. To install it, pop the hood: there are three nuts holding the vent, and John also removes the metal shroud to get at everything. Small clips hold the vent too; a little pressure persuades them out. Then bolt the carbon vent on with the factory duct still in place and put the rubber grommet back over the third nut. He calls the install easy and the fitment amazing, and likes that it's bolted down so it can't shift left and right, and that it lets hot air out of the engine bay.
Vehicle & fitment
- Product
- Extreme Online Store carbon fiber front hood vent replacement for the 2023+ Acura Integra / Integra Type S
- Shown on
- Acura Integra Type S (DE5, John's car)
- Extreme Online Store (EOS) carbon fiber front hood vent replacement for the 2023+ Acura Integra (store link in the video description)
- Full replacement for the factory hood vent, not an overlay; bolts on and keeps the factory duct
Always confirm fitment for your exact year and trim with the seller before buying.
Tools & parts
Tools
- Socket for the three vent nuts
- Clip/trim tool for the plastic clips
Parts
- EOS carbon fiber hood vent
Video chapters
- 0:00Project introduction
- 1:54Removing the old vent
- 2:23Installing the new vent
- 3:32Final inspection and look
Step by step
- 1
What you're getting▶ 1:00
A one-piece carbon vent that bolts on and fully replaces the OEM vent. It's carbon on top and underneath, and it feels solid.
- 2
Pop the hood▶ 1:50
Under the hood you'll see three nuts holding the vent (the last one is hard to see).
- 3
Remove the metal shroud▶ 2:13
John removes the metal shroud to get clear access.
- 4
Release the clips▶ 2:32
Small clips hold the vent too. Use a bit of pressure to persuade them out.
- 5
Bolt on the carbon vent▶ 4:16
Bolt the new vent on with the factory duct still in place, then put the rubber grommet back to hide the third nut.
- 6
Verdict▶ 5:02
Great fitment, it's bolted down so it won't shift, and it vents hot air from a spot that gets really hot.
Wiring notes
- No wiring: bolt-on carbon vent.
- Reuses the factory nuts and duct; the rubber grommet goes back over the third nut.
Get the parts
- Socket set with 10mm: Generic pickGeneric pickBuy ↗
- Clip and trim removal tool set: Generic pickGeneric pickBuy ↗
- EOS carbon hood vent replacement for the 2023+ Acura Integra (Extreme Online Store, link from the description)Buy ↗
As an Amazon Associate I earn from qualifying purchases. Some links are affiliate links.
FAQ
What vehicle does this install fit?
It is shown for the Extreme Online Store (EOS) carbon fiber front hood vent replacement for the 2023+ Acura Integra (store link in the video description). Full replacement for the factory hood vent, not an overlay; bolts on and keeps the factory duct Always confirm your exact year, trim and factory audio with the seller.
How long does the install take?
John's full video is 6 min. Plan on that much time for a careful DIY install, plus extra if you are new to dash work.
What tools do I need?
Tools called out in the guide: Socket for the three vent nuts; Clip/trim tool for the plastic clips.
Where do I get the parts?
Use the buy links on this page for the unit and any harnesses John used. Some links are affiliate links.
Is this beginner-friendly?
The guide breaks the job into 6 steps with timestamps into the video. If you can remove trim panels carefully, you can follow along.
John's Acura Integra Type S
More photos →

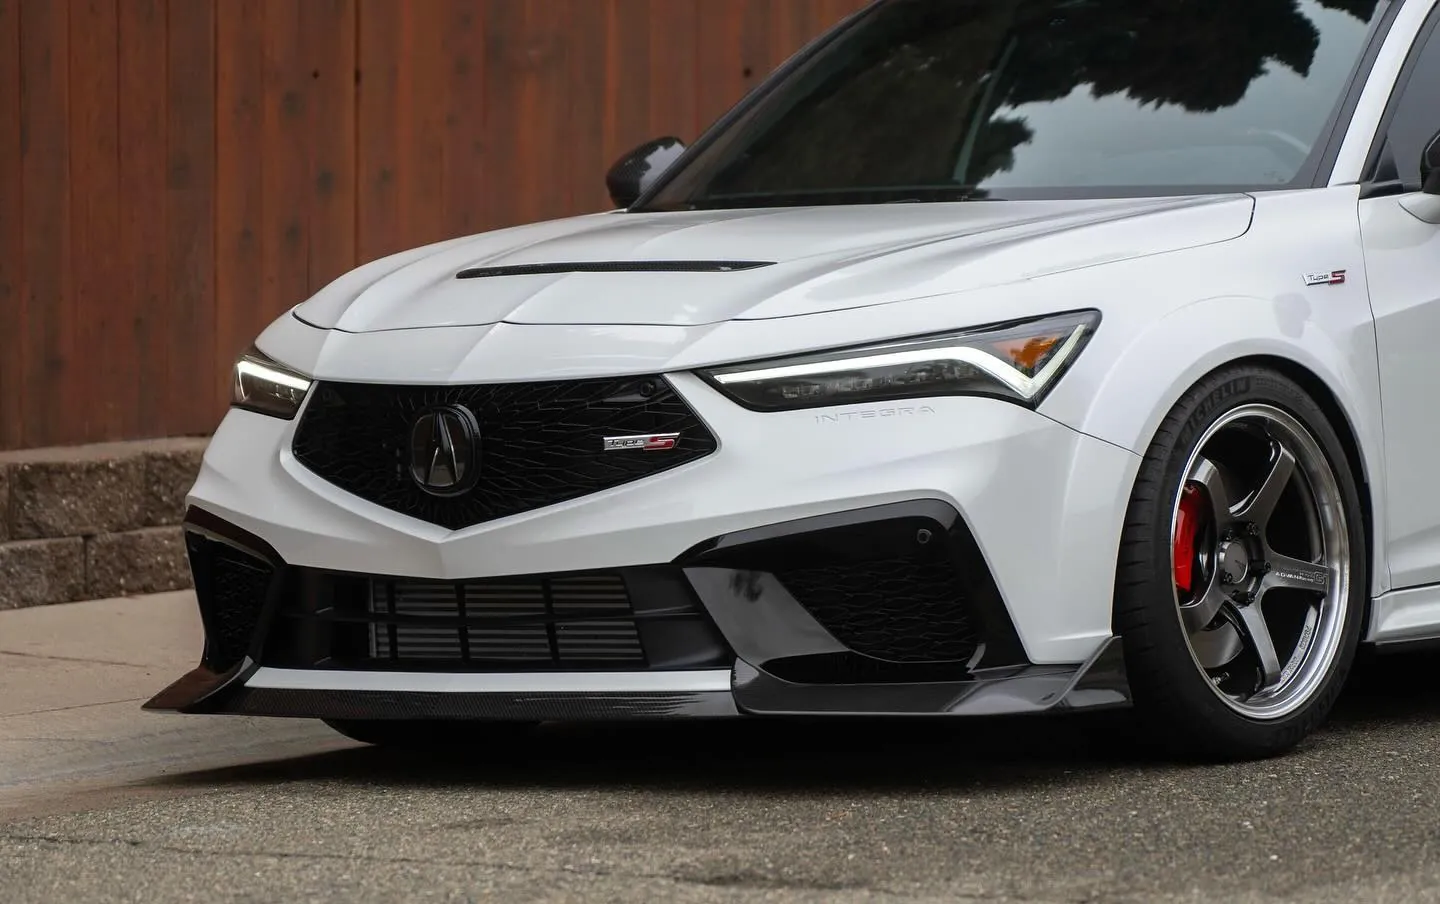
Photos from @ngooyen on Instagram. Follow for more.
Full transcript
Show the full transcript (49 lines) +
0:26What's up guys, it's your boy John back again here with another video today
0:30We're gonna be working on the agro tiger type s now my car is really carbon fiber now
0:36We got the front lip the side skirts the mirror the spoiler all that stuff
0:41that's really
0:42Really though but I really wanted to. Replace the hood right here and currently I have an overlay, which I am well
0:49Worried it might fall off because it gets it. Of.
0:52Of course when he's pushing on it, but the good thing is I have the new extreme online store right here, and it is
1:03One piece it actually bolts on so it's not overlay it fully replaces the OEM
1:09Which is nice now
1:10I got the heat the great thing about extreme online store is if you live in America United States it ships super fast
1:18Took like two days to get it to my house
1:22And the packaging was amazing
1:24I unboxed it and then it was wrapped very nicely
1:28And it definitely they had extra wrapping around these studs right here, which is nice, but here's the underside
1:35Carbon fiber in the bottom of people you don't see and then carbon fiber on the top now
1:40It does here extremely sturdy, which is confidence inspiring. You can check out the weave real quick
1:50Now install shouldn't be too bad. Let's pop the hood and pop it in
1:54Let's pop the hood
1:59Engine bay bling right here. Super nice
2:03Let's remove you see the three
2:07Nuts here. You probably can't see the last one
2:12All right, I'm actually going to remove this metal shroud right here
2:16because uh
2:18Pretty easy to remove so remove that
2:24Once you remove the shroud right there, you want to see the
2:26Little tens right here. So you just pop those tens off after you remove that metal shroud I have right there
2:32so let's get to it. So there's these
2:42little clips I'm using to persuade out by
2:46I get a little bit of pressure on it just to get it through.
3:16Now we just do
3:33Now we just do that
3:35All this piece is much lighter
4:16Here we go bolt it on got the factory duct right there there easy install and I
4:24put the rubber garment to hide that third now the fitment is amazing
4:32you yourself got some great lighting in here so you can really judge it let me
4:38a little bit.
4:40F, no.
4:42You'll see.
4:44You'll see.
4:46You'll see.
4:48You'll a little bit.
4:50You'll see.
4:52You'll see.
4:54No, I'm just getting...
4:59That's the place, you can kind of see, going through.
5:02It looks it, it looks awesome, just a nice piece, fitment is great, I love it, I love, I love how it's a
5:12metal, because it does get really hot right there, so it's nice that it's exhausting
5:22all that hot air, it's great fit me, it's really nice that it's bolted down so you
5:28don't let the worry it shifting left and right the right. But yeah, thank you guys for watching.
Machine-transcribed from the full-length video and lightly cleaned (product names fixed). Watch the video for exact wording.
Next step


